Como criar seu negócio de comércio eletrônico com a Shopify (em 5 etapas)

Conteúdo
Shopify is an excellent platform for eCommerce entrepreneurs. As an all-inclusive solution with plenty of tools to help you grow your store, it’s no wonder that mais de um milhão de empresas o utilizam. No entanto, você pode estar se perguntando como começar.
Fortunately, Shopify provides plenty of paths to becoming a successful enterprise. Whether you’d like to sell products or services, online or in-person, you’ll likely find solutions that can help you on your way.
In this post, we’ll introduce you to Shopify and highlight the features you might find most helpful. Then, we’ll walk you through how to build your eCommerce store in five steps. Let’s get started!
Uma introdução à Shopify
Shopify is an eCommerce platform with a lot to offer business owners. Whether you sell physical items, digital products, or even services, you can use this solution to create an online storefront.
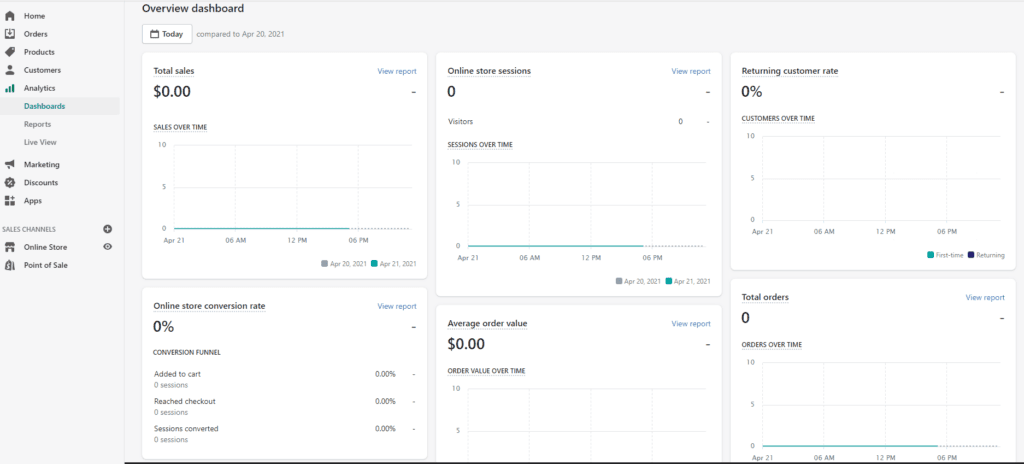
Shopify comes with many features that may make it a better choice for you than other options. For example, its robust reporting and analytics can make planning and tracking financials much easier:
If you also have a brick-and-mortar store, Shopify integrates effectively by offering a point of sale (POS) that lets you work seamlessly between your physical and virtual storefronts. You can even use the mobile POS when you’re on the move.
Another benefit of the eCommerce platform is, it’s incredibly easy to use. If you’re already selling on another website, Mudança para a Shopify é uma questão simples.
Como criar seu negócio de comércio eletrônico com a Shopify (em 5 etapas)
Now that we’ve covered the basic elements of Shopify, it’s time to get your store ready. For this article, we’ll assume that you’ve already created a plano de negócios and know what you’ll be selling.
Etapa 1: Crie uma conta da Shopify e dê um nome à sua loja
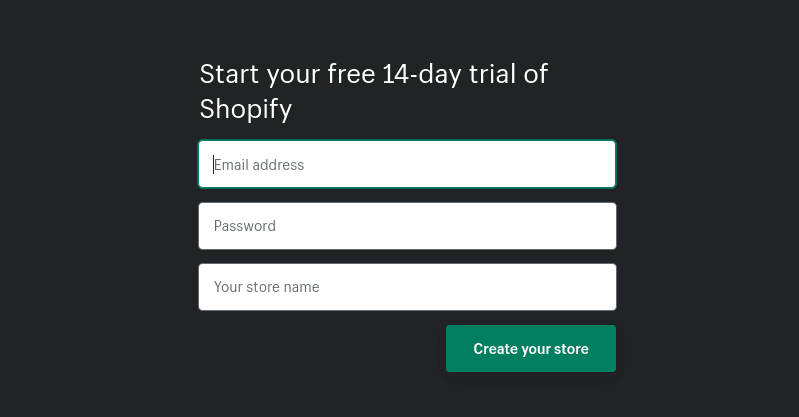
A Shopify oferece um Teste gratuito de 14 dias that you can use to get started. You’ll be prompted to enter the name of your store, which will become part of the store’s URL. It will be something along the lines of YourStore.MyShopify.comembora você possa adquirir um domínio personalizado posteriormente:
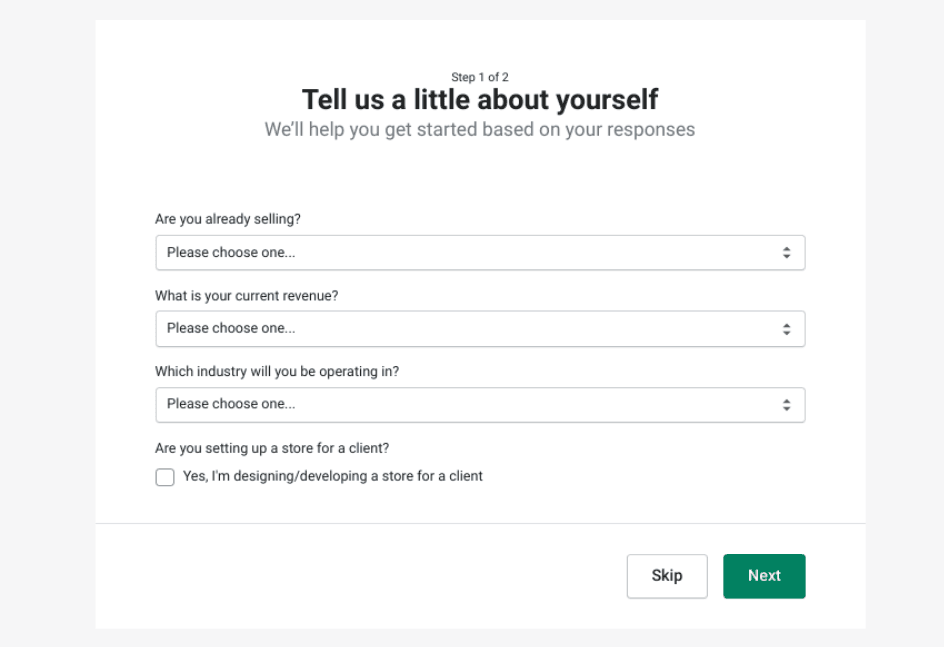
You’ll be able to answer a few questions about your business to help Shopify make suggestions. You’ll also need to enter a business address:
Once you’ve filled out the information, you can select Próximo. This will bring you to your shop’s dashboard.
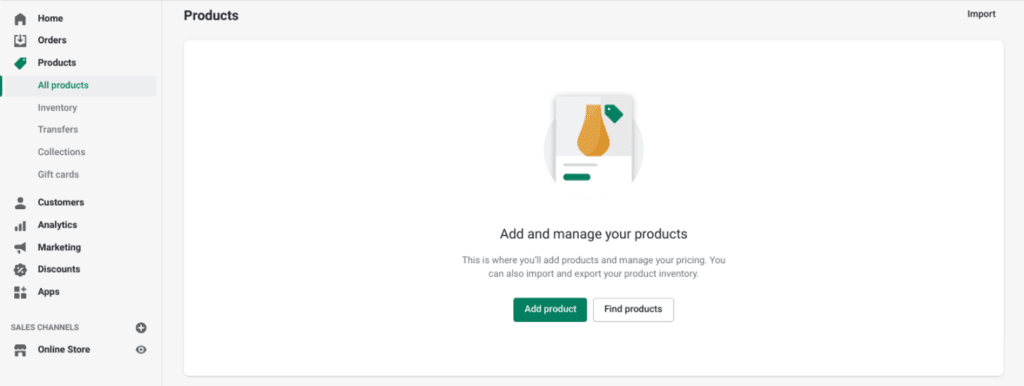
Etapa 2: Adicionar produtos à sua loja
Em seguida, você pode começar a adicionar itens à sua loja navegando até Produtos > Adicionar produto:
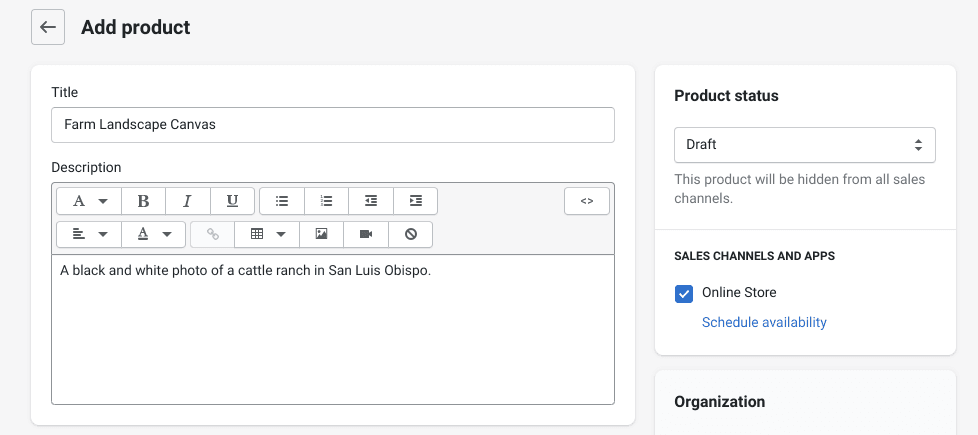
Aqui, você pode adicionar um título e uma descrição do produto. Tente transmitir brevemente o que é o produto com seu título e use a descrição para detalhar mais informações:
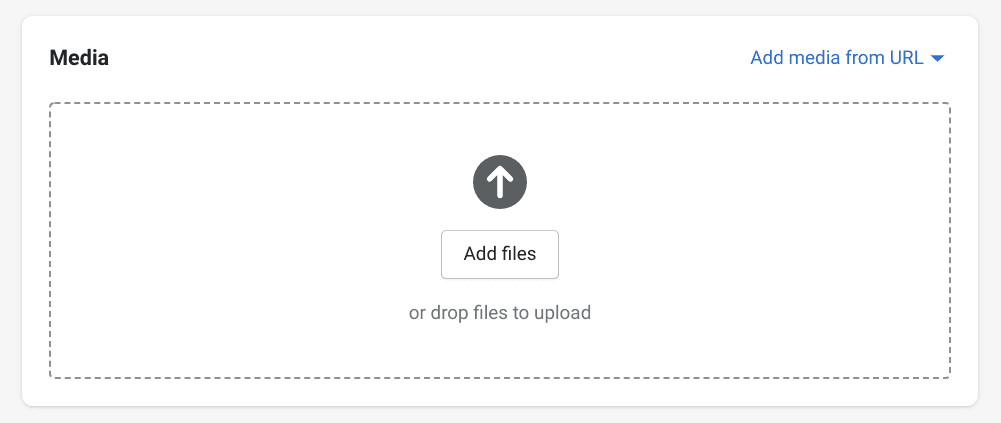
Você pode adicionar imagens para sua listagem na seção Mídia seção. Clique na seção Adicionar arquivos para localizar um arquivo em seu dispositivo. Há também uma opção para adicionar mídia de um URL:
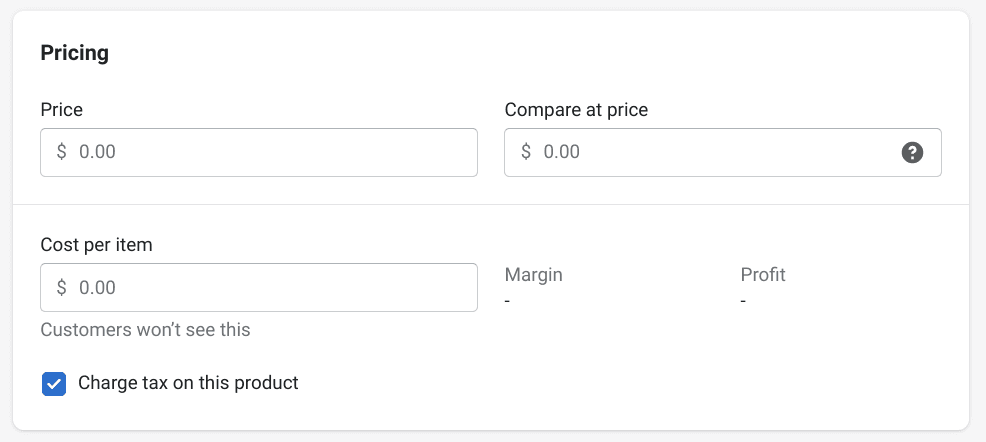
Em seguida, você pode adicionar informações sobre preços. Se o produto tiver desconto, você poderá inserir o preço original no campo Comparar preços box. Finally, Custo por item ajudará a monitorar o lucro:
No Inventário é possível adicionar um SKU ou código de barras, se necessário. Você também pode digitar seu suprimento atual de um item na seção Disponível campo:
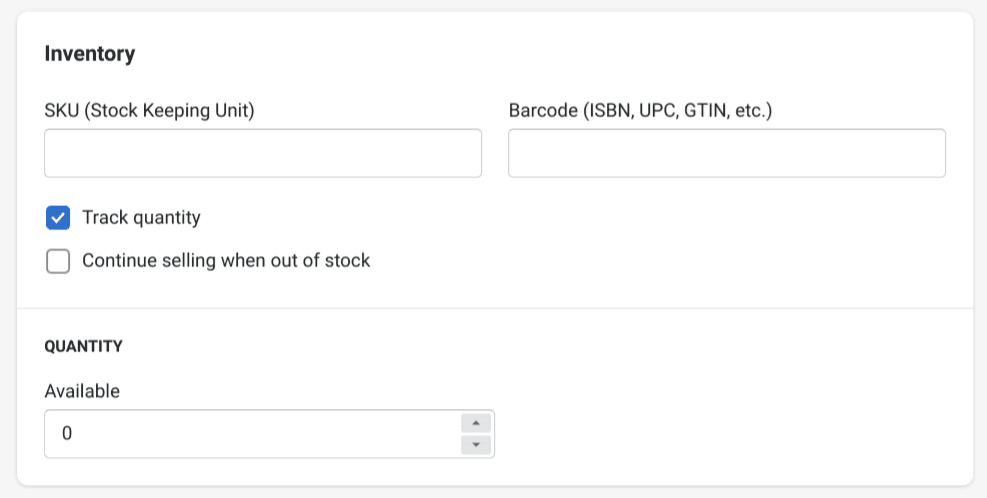
If you’re able to replenish your product quickly, you may want to select the Continuar vendendo quando o estoque estiver esgotado opção. Caso contrário, o item será marcado como esgotado quando seu estoque se esgotar.
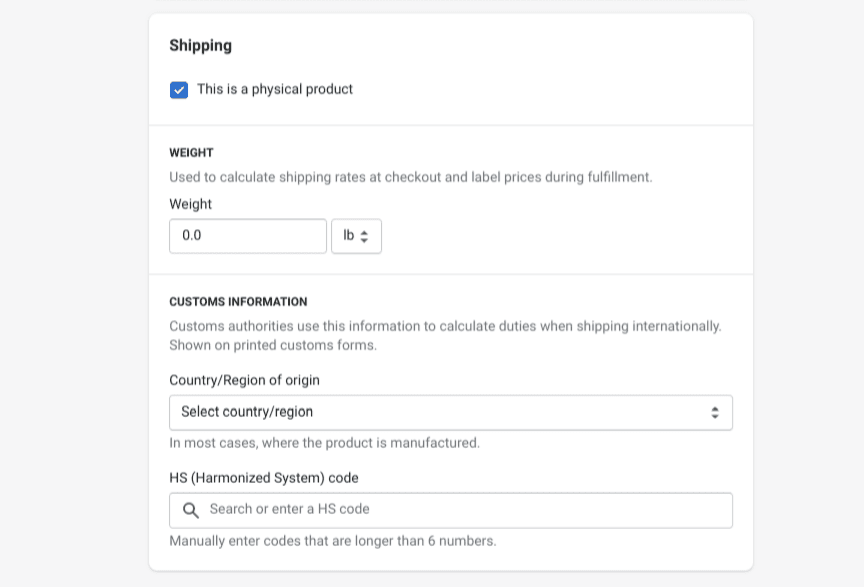
For physical items, you’ll need to configure shipping settings. You can input the weight of your product so that Shopify can calculate shipping costs. We also suggest filling out the Informações alfandegárias se você vende internacionalmente:
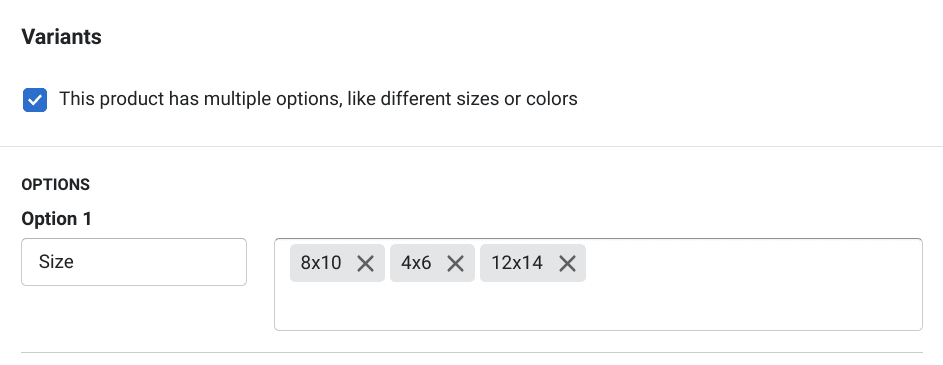
You can add variants of your products, such as different sizes or colors. To get started, select the box under Variantes e digite as opções disponíveis:
Remember to add media, pricing, inventory, and shipping information for each variant. When you’re done, click on the Salvar botão. Você pode repetir esse processo para quantos produtos quiser.
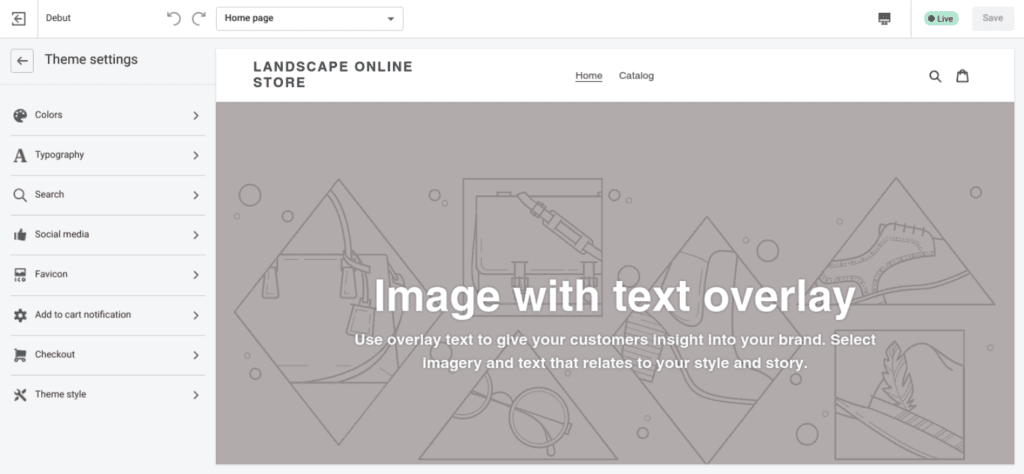
Etapa 3: Escolha um tema e personalize sua loja da Shopify
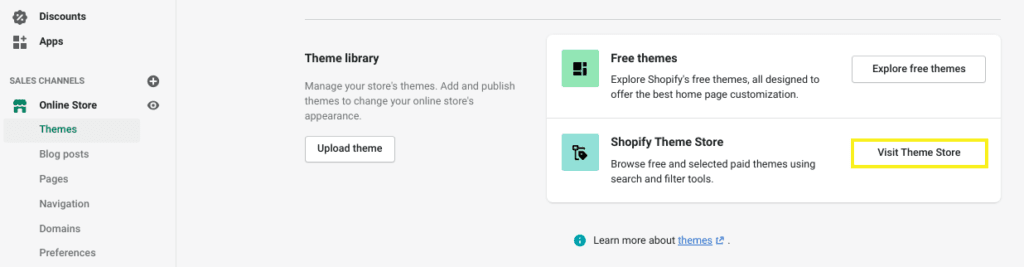
Shopify’s Theme Store oferece muitos designs, a maioria dos quais você pode personalizar ainda mais. Para começar, navegue até Lojas on-line > Temase, em seguida, clique em Visite a loja de temas:
While you can always change it later, it’s important to take your time escolhendo um themeTalvez seja necessário visualizar alguns antes de tomar sua decisão. Quando encontrar um que lhe agrade, selecione o Adicionar tema botão.
Once it’s installed, you’ll find yourself back on your dashboard where you can begin customizing. First, click on the Personalizar o tema botão:

Você pode criar suas páginas arrastando e soltando as várias seções. Dependendo do seu tema, você poderá adicionar apresentações de slides, produtos em destaque e até mesmo um lista de e-mail registro.
Você também pode customize your shop’s navigation using the same drag-and-drop interface. You’ll likely want a menu in the header, but you can also place one in the footer. You may want to include a search bar, especially if you have a large offering.
You can change the theme’s fonts and colors to match sua marca sob o Configurações do tema seção:
Também em Configurações do tema é a opção de personalizar sua página de checkout. Adicionar seu logotipo e algum texto pode ajudar a tornar o processo de checkout mais coeso. Você também pode considerar a possibilidade de explorar contas de clientes e carrinho abandonado opções.
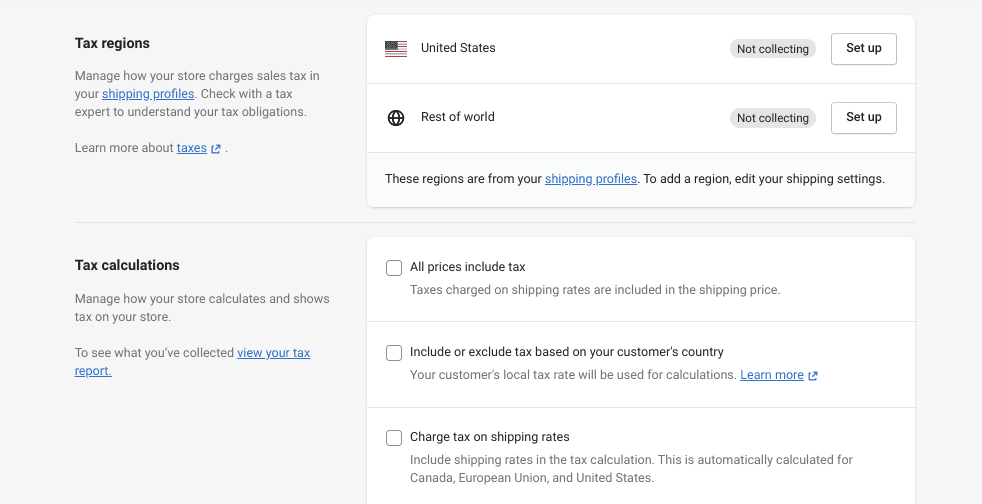
Etapa 4: Configure suas opções de imposto, pagamento e envio
Shopify handles most tax calculations automatically, but you’ll still want to research your particular situation. To make changes to the default tax rates, you can navigate to Configurações > Impostos:
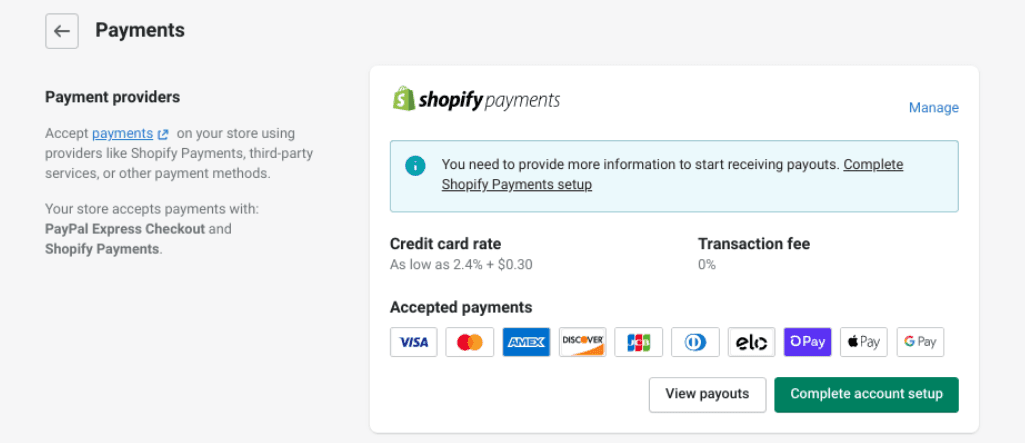
Escolha os gateways de pagamento navegando até Configurações > Pagamentos and selecting the options you’ll offer. You can also set up Pagamentos da Shopifyque permite que você aceite rapidamente a maioria das formas de pagamento:
Por fim, você pode configurar suas opções de envio. Para começar, navegue até Configurações > Frete e entrega:
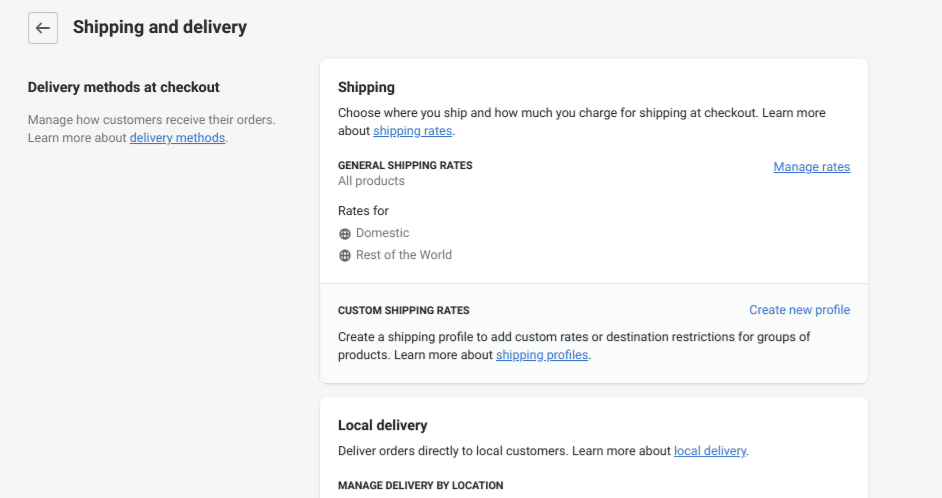
Existem várias abordagens para remessae talvez seja necessário fazer experiências para descobrir o que funciona melhor para você. Você pode até mesmo configurar a coleta e a entrega local nessa tela.
Etapa 5: Lançar sua loja
Embora haja muito mais que você possa fazer, incluindo Configuração de análises e otimização de mecanismos de busca (SEO)Se você estiver pronto para lançar sua loja, ela estará quase pronta. Para colocá-la no ar, você pode navegar até Online Store > Preferencesrole para baixo até Password Protectione clique no botão Escolha um plano link:
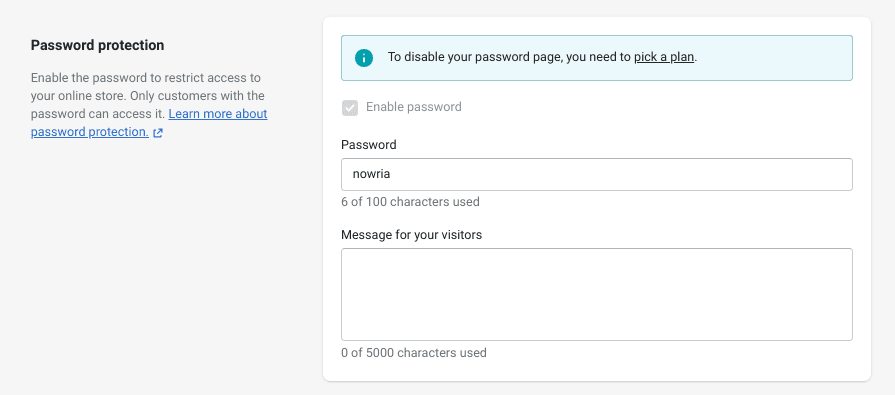
Once you’ve completed the checkout process, you’ll be able to remove the password page. Congratulations! You’re officially open for business.
Conclusão
Shopify is a powerful eCommerce platform, but it can be a bit overwhelming when you’re just getting started. Understanding its capabilities and how you can make them work for you can help you see where they fit into your particular business.
Let’s recap the five steps we shared for building your e-commerce store with Shopify:
- Crie uma conta na Shopify e dê um nome à sua loja.
- Adicione seus produtos à sua loja.
- Escolha um tema e personalize sua loja da Shopify.
- Configure suas opções de impostos, pagamento e envio.
- Lance sua loja.
Você tem alguma dica para usar a plataforma Shopify?? Compartilhe-as conosco na seção de comentários abaixo!
Se você gostou deste artigo, não deixe de nos seguir em Facebook, Twittere LinkedIn! And don’t forget to subscribe in the box below.
Sobre John Hughes
John é um viciado em blogs, fanático por WordPress e redator da equipe.
Andy Globe
10 de janeiro de 2022
Great article. It was really helpful for me. Thanks for sharing
andy globe
fevereiro 4, 2022
Hello, Thank you so much for sharing this very informative article. This will help me and many others also. thanks a lot.
andy globe
março 15, 2022
Thank you for sharing the awesome article with us. that's very useful. Provides much-needed knowledge.